More Details
NATALIE STOPKA
FABRIC & LEATHER MARBLING
Explore the fine art of textile & leather marbling with artist and educator Natalie Stopka in this premium, fluid art workshop. With over a decade of marbling experience and an extensive knowledge of the chemistry and artistry behind the craft, Natalie introduces advanced techniques including lettering, creating negative space, and sealing our final projects.
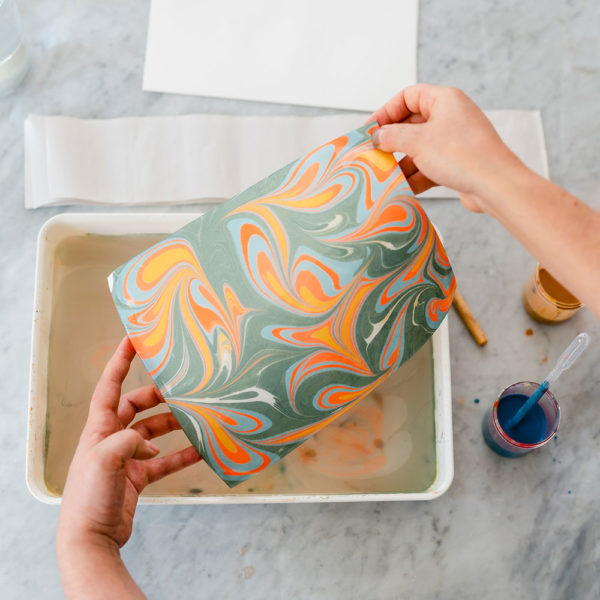
Bring beautiful color and pattern into your home with marbled fabric and leather goods. Making a marbled monotype is a delightfully fluid way to design, utilizing paint floating on the surface of water thickened by carrageenan. Once manipulated into a design, fabric or leather is draped across the surface to pick up the pigments “in their lively patterns, looking as if they are still dancing on water,” describes Natalie.

EXPERT-LED MARBLING WORKSHOP
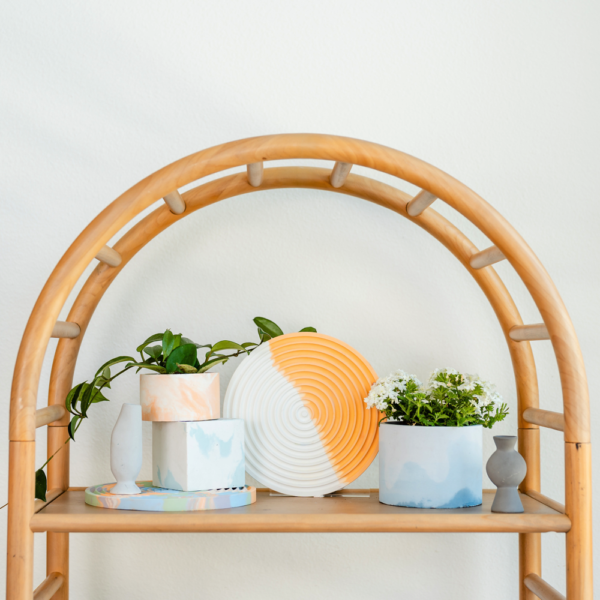
In this workshop, Natalie teaches us the setup, design, and printing process as we create one-of-a-kind tea towels, napkins, Habotai silk ribbon, and leather coasters. One of the featured projects includes learning to make a custom fabric bunting with negative space lettering from start to finish.
We learn the importance of chemical compositions as we incorporate aluminum sulfate, carrageenan, and Photo Flo to get the optimal surface tension and viscosity through the preparation and printing process. The addition of a handmade maple marbling rake and oversized tray helps us to create an evenly repeating design and expands our vocabulary of patterns on much larger surfaces. After sharing several marbling techniques and how to apply them for various results, Natalie shows us how to complete our projects and even treat fabrics with a painting medium that acts as an acrylic sealant for a durable—and washing friendly—finish.
FABRIC & LEATHER MARBLING KIT
Natalie has curated a kit with all the premium tools and materials needed to get started in fabric and leather marbling. Luscious cotton and silk fabric, napkins, kitchen towels, and pre-cut circular leather coasters form the base for our marbled projects. The aluminum sulfate, carrageenan, and Photo Flo are used to get the optimal surface tension and viscosity throughout the preparation and printing process. The addition of a handmade maple marbling rake creates an evenly repeating design and expands our vocabulary of patterns.
Watching Natalie maneuver her designs through layers of pigment and shape is truly a magical and mesmerizing experience. “With a strong focus and craftsmanship, I explore color and form through extemporaneous pattern-making,” she shares. Her skills as a fine artist shine through along with her knack for educating others in the intricacies of marbling. Natalie encourages us to continue on in the craft, experimenting with all sorts of patterns along the way.
THE SCIENCE OF MARBLING
Not only does Natalie share a detailed and thorough tutorial of the marbling process, but she also explains the fascinating chemistry that makes this artform come to life. Let’s learn more about some kit components that may be unfamiliar to you. Aluminum sulfate is used to prepare the paper, it bonds to both the surface of the paper fibers as well as the paint to create a permanent and lightfast print. Natalie shares that it is “chemically charged to bond to other molecules” and is used to create a “mordant” that coats the surface of the paper.
Carrageenan is a natural derivative of seaweed and creates a viscous liquid for our tray that has a higher surface tension than water alone. Photo Flo is a surfactant added to certain paint colors in order to decrease surface tension and let the paints float long enough to manipulate into a design. And here’s where the magic happens! The low surface tension of the paints combined with the high surface tension of the size allow for us to get creative with marbling patterns and create each unique print.


TWO MARBLING WORKSHOPS
We produced two beautiful workshops with Natalie Stopka. How is this workshop different from our Paper Marbling Workshop? At almost twice the length in video instruction, think of our premium workshop as the next step in exploring this fine art craft.
Of note is:
- Advanced techniques in overmarbling and pattern making (including a custom marbling rake that perfectly fits our extra large translucent tray)
- An upleveling in size of projects: a larger tray means a bigger vat and a larger surface space with which to explore (even an entire linen pillow sham, see our add-ons below)
- Instruction on working with negative space and how to create letters or other shape imprints (a featured project is the gorgeous celebration bunting - which we're making together from scratch - above!)
- The addition of High Flow acrylic inks to the project materials and eight brand new colors (including fluorescents)
- The introduction of a new chemical + sealing instructions for water resistance
- Finally, we've curated a brand new selection of custom blanks with which to explore: cotton, linen, silk & leather. Be sure to check out our add-ons for this workshop which have allowed us to partner with small businesses, craftswomen & sewists, too.
If this is your first opportunity to explore marbling, Natalie does include an intro to the craft and you should feel comfortable jumping right in. We can't wait to see how you create under the thoughtful guidance of expert instructor & fine artist, Natalie Stopka.

More About our Artist: Natalie Stopka
Natalie Stopka is an artist and educator focused on historical surface patterning techniques including marbling, dyeing, and printmaking. She loves to explore natural and historical colorants, incorporating botanical dyes and handmade pigments in her work.
"I make abstract, organic drawings and prints rooted in the materials and forces of the natural world. These meticulous, layered images incorporate plant dyes that are reciprocally foraged or grown in my studio garden. The plants provide me with a seasonally evolving vocabulary of texture and color generated from the soil beneath my feet and the water moving through it. I closely observe my handmade materials and work collaboratively to express their physicality, chemistry, changeability, and ephemerality on the page."
Natalie’s freelance studio and dye garden are located in Yonkers, New York: nataliestopkastudio.com.

We look forward to sharing this fulfilling and joyful experience with you and cannot wait to see how your marbled crafts turn out. Be sure to share your creative journey and finished creation with us by tagging @thecraftersbox + @nataliestopka in your social posts, and use #thecraftersbox so our community can also see your workshop come to life! Happy making.